Your Personal QR Code | Lifetag
THREE Easy Steps Towards Your Personal QR Codes
Sign up
Sign up and navigate to the QR Code section. Click 'Add New,' name your QR Code, and hit 'Save' to get started.
Design your QR Code
Add your data to predefined or custom segments with no limits. Choose to make content public or private
Download & Share
Generate your QR Code, download, print, or share with anyone. All is dynamic—update the content anytime.
Step 1 - Sign Up
Sign Up And Select Desired Currency
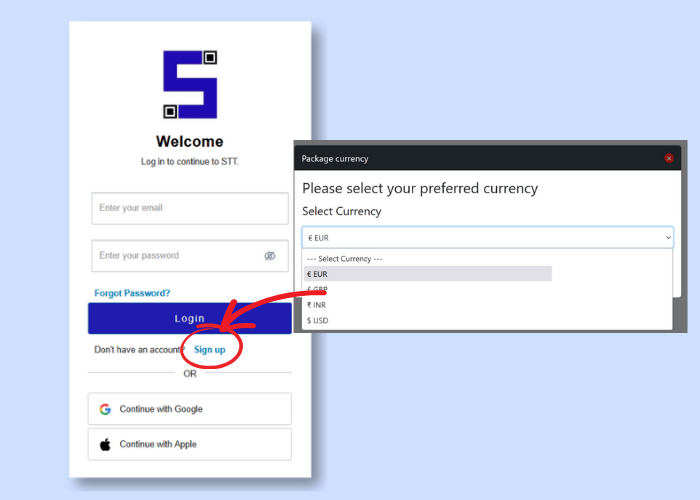
- Sign up instantly with Google or Apple—no verification needed!
- Prefer email? Sign up via email with quick verification.
- Choose your currency for a seamless payment experience.
Step 2 - Design Your QR Code
Add Your New QR Code
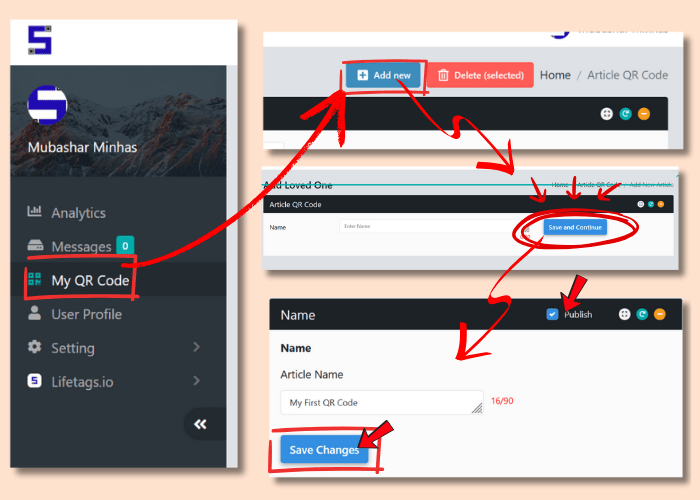
- Go to My QR Code → Click Add New
- Name your QR Code → Click Save and Continue
- You can rename it anytime by updating the name and pressing Save Changes
Upload Images

- Upload from your computer or capture directly from your mobile camera
- Submit images to include them in your QR Code
- Control visibility by checking/unchecking the Publish Box
Build Your Landing Page
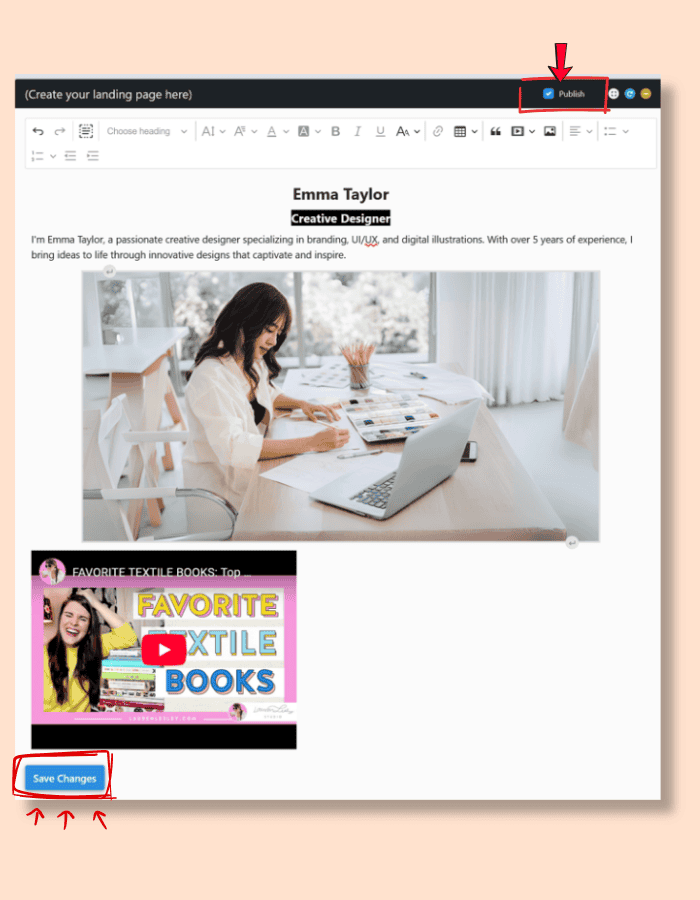
- Use the Description Box to design your micro web page
- Add text, colors, fonts, tables, images, videos, and links
- Always press Save Changes before leaving
- Publish/unpublish anytime via the Publish Box
Add Sections & Subsections
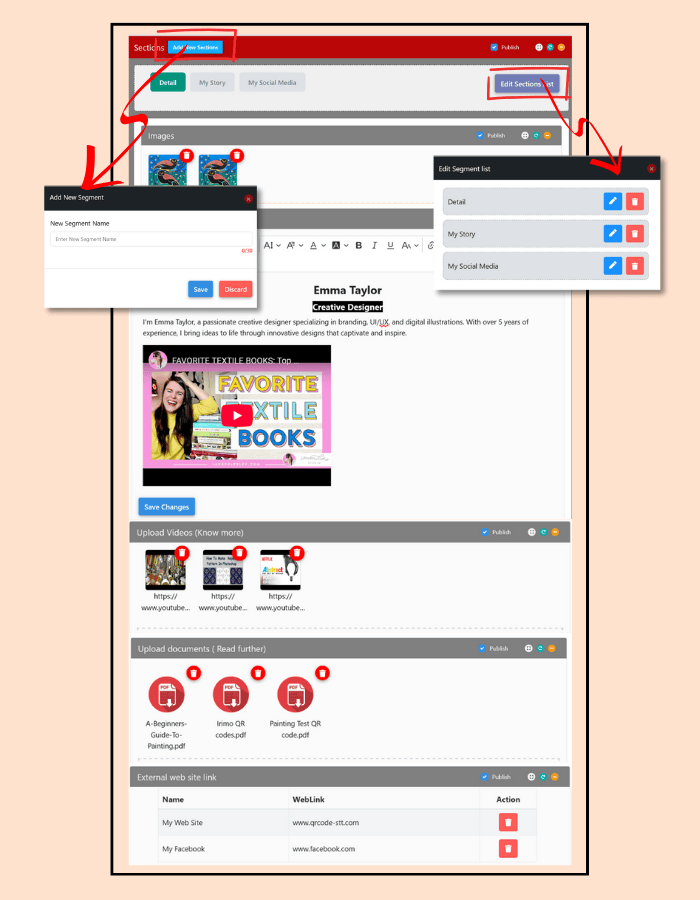
The Detail section is default; rename or add unlimited sections
Each section supports Images, Landing Pages, Videos, PDFs, and External URLs
- Image Uploading – Add images and submit; control visibility with the Publish Box
- Landing Page (Description) – Create a custom micro web page for each section; save changes and control publishing
- Videos – Paste a YouTube URL or upload videos; submit and manage visibility
- PDF Upload – Upload PDFs and press Submit
- External Links – Add website, social media, or form links with a custom name
Attach Certificates

- Select and upload certificates from your profile or directly here
- Press Save changes button and manage publishing settings as per need.
Whats App Chat Integration
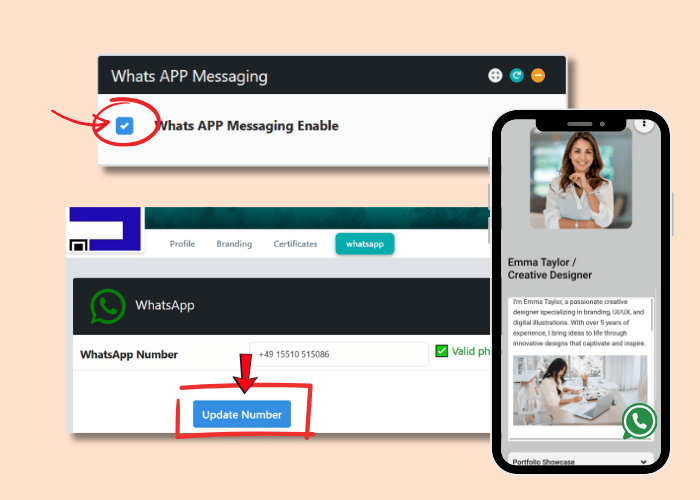
- Enable/disable WhatsApp chat after linking your number in the User Profile
Email Messaging
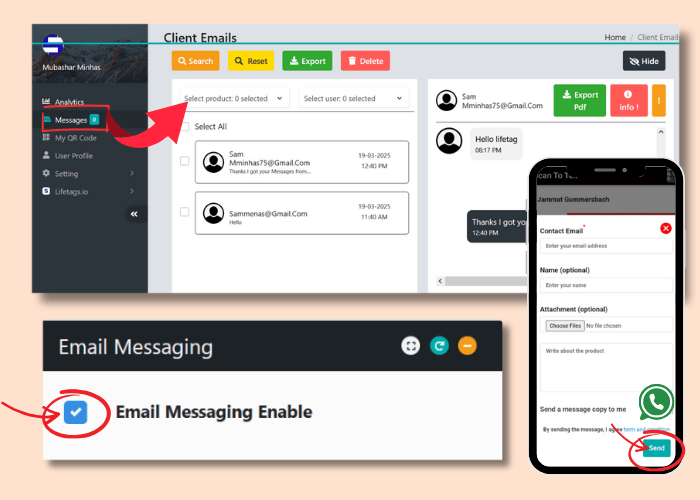
- Users can contact you via a “Click to Connect Now” button after scanning
- View and reply to messages in the Messages section
- Enable/disable email messaging anytime
Step 3 - Create and Download Your QR Code
Create your QR code
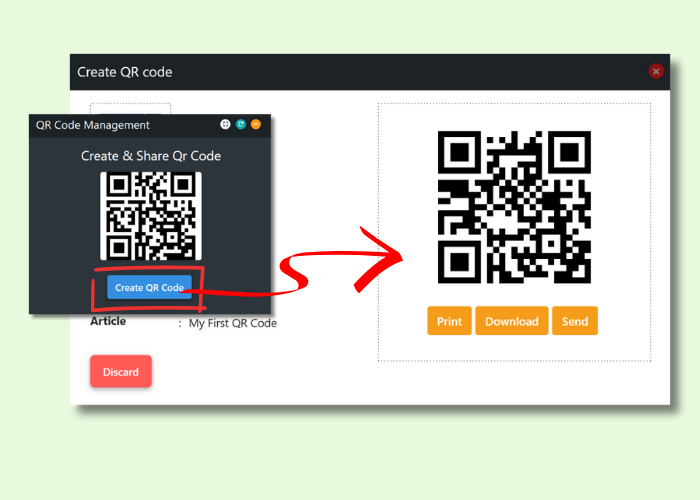
- Click Create QR Code to generate your QR code instantly.
- Download in PNG format, print, or share via email.
- Dynamic data: Update anytime without changing the QR code.
Other Important Features
Managing Your QR Code
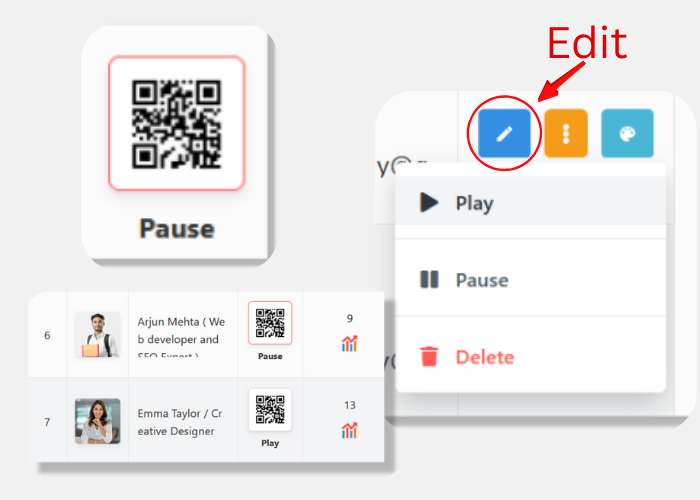
- Edit Anytime: Click the edit icon to update your QR code content anytime.
- Dynamic & Permanent: The QR code stays the same, no matter how many times you change the content.
- Control Options: You can play, pause, or delete your QR code whenever needed.
QR Code Popup & Easy Access
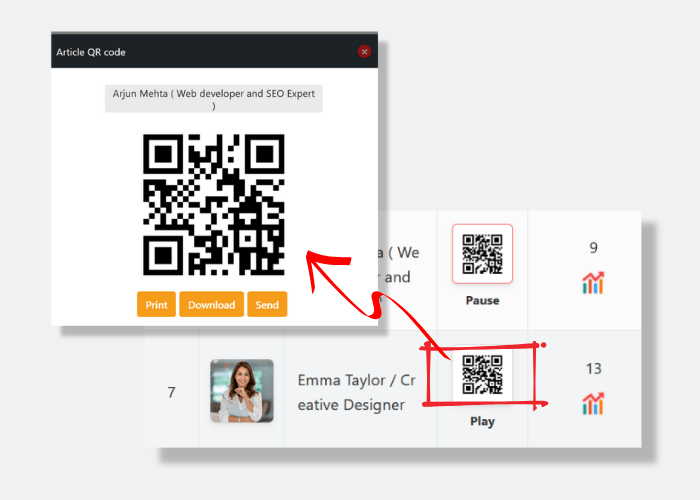
Code Popup & Easy Access
- Quick Access: Click the QR code icon to open a popup.
- Instant Actions: Scan, download, print, or share via email directly.
- Convenient Testing: Easily test your QR code before sharing.
Customize Your QR Code Display
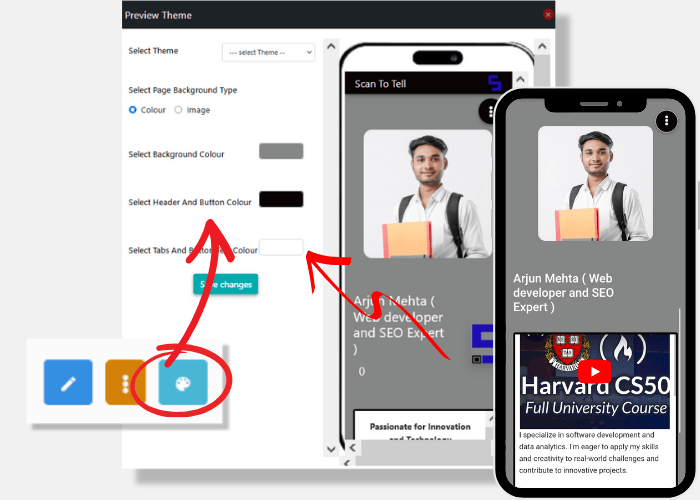
- Personalized Look: Change how your content appears to viewers.
- Background Options: Choose a background color or upload an image.
- Brand Matching: Select button and text colors to match your brand.
- Save Your Changes: Always click the “Save Changes” button after making updates.
Access & Manage Your Data
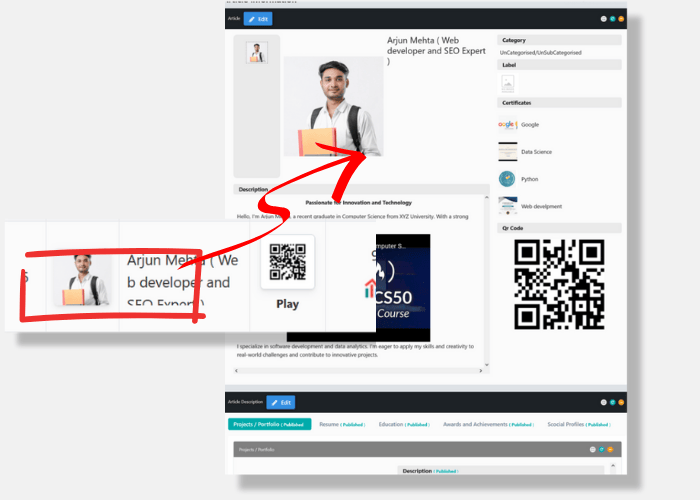
- Quick Access: Click the image to view all your stored data.
- Easy Editing: Update your information anytime by clicking the edit icon.
- Full Control: Manage and modify your content whenever needed.